

The Cobbled Road Blanket crochet pattern is one of those designs that sat stewing in my mind for a long time before I got the chance to make it a reality. I’ve seen several other patterns made using colour changing cakes and loved how the colour changes enhanced the pattern and gave the projects another beautiful dimension. Seeing how the colours change and swirl together across the blankets is just fascinating and strangely hypnotic.
I needed to create one of my own.
I wanted a simple design, using just one stitch that would show the slow, gradual colour changes off to their best. The stitch that came to mind was one that I had used before and had been wanting to use again in another project.
The Cobble Stitch
I first used the Cobble stitch during my Ray Of Hope crochet along and loved how simple yet pretty it is. It’s a pretty stitch when you make it with just 1 colour, but when you make it using 3 alternating colours it looks simply stunning! I’ve been longing to use it in another pattern since, and finally found the perfect project for it.
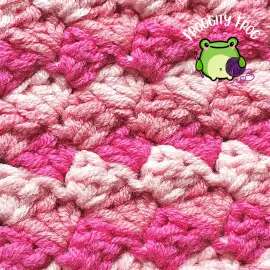
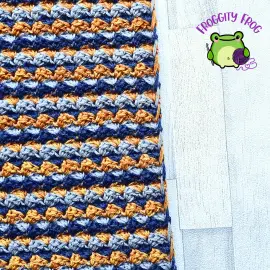
The Cobble stitch looks like a series of wedges that interlock together as you go up the rows. It’s an easy stitch to make, ideal for beginners who are ready to branch out try something with an easy mix of the basic stitches. The repeat for this is just 1 row and the Cobble stitch is double sided and creates a hole free fabric.
This simple stitch looks fabulous and because it is completely flat, you get to see all the detail of it and the gradual colour changes of the ombre yarn are shown to their full effect.
The Yarn
In 2024 I started teaming up with Yarn Shop By Stay Alive – an independent yarn maker who creates her own fabulous yarn cakes that I can completely customise to my needs.
I can choose my own colours, how much yarn is in each cake, the order the colours are wound into the cake and the fibre weight – you can too! Check out your choices here.
So this gave me the perfect chance to choose my own colours to create and customise my very own triple yarn cake blanket using the Cobble stitch and finally realise the idea that’s been bouncing around my brain for so long.
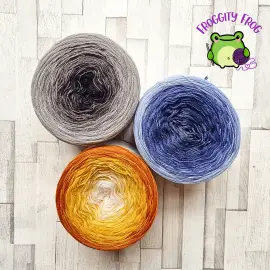
I created 3 custom yarn cakes from Yarn Shop By Stay Alive. All 3 are 4 ply 100% merino ombre cakes with 1000m of yarn in each. The cakes I chose are:
Make sure you use the code FROG5 at checkout to get a discount off your purchase from Yarn Shop By Stay Alive
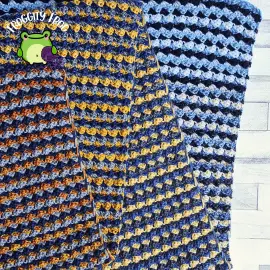
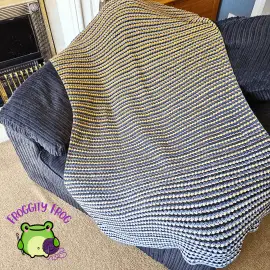
These 3 cakes gave me enough yarn to make a gorgeous light weight lap blanket. Choosing merino as the fibre means that the Cobbled Road Blanket is wonderfully warm and cosy while not being heavy at all.
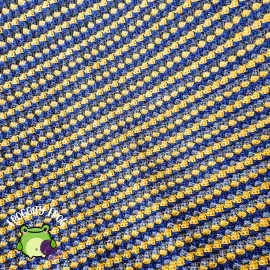
Each cake is made up of 4 colours which change thread by thread to make a beautiful ombre effect which makes the colours look like they are changing slowly as you work your way up the blanket. I chose these sets of colour as I thought they complement each other well and as the colours are all different, there would never be any colours that matched or blended together anywhere throughout the blanket.
You can use any 4ply yarn for this project, you will need 300m of yarn in total.
So how can you make this gorgeously easy crochet blanket pattern for yourself?
The Cobbled Road Blanket Crochet Pattern
When starting this design, my intent was to keep this as simple a pattern as possible. So this is just a simple one row repeating with no border to add afterwards.
To make this blanket you will need:
- 3 x 1000m 4ply yarn cakes
- 4mm hook
- Stitch markers
- Darning needle
Gauge = 21 rows in 10cm, 9 Cobble stitches in 10cm – *(sc, hdc, dc), sk2*
This gauge gave me a finished blanket measuring 140 x 80cm – the perfect size for a lap blanket.
Abbreviations
All abbreviations are given in US terms
- Ch = Chain
- St = Stitch
- Sc = Single Crochet
- Hdc = Half Double Crochet
- Dc = Double Crochet
Cake A = The blue ombre cake. Cake B = The grey ombre cake. Cake C = The gold ombre cake.
With Cake A make a foundation chain of 206
Row 1. Continuing with Cake A, in the 3rd chain from your hook (your turning chain counts as a sc) make a hdc. and a dc.
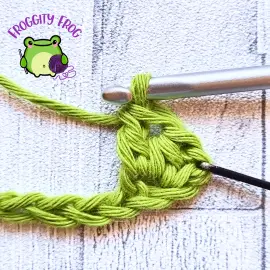
*Skip the next 2 chains and make (sc, hdc, dc) all in the same stitch*
repeat between *and* until you have 3 chains left. Skip 2 chains and make a sc in the last stitch of the row, changing to Cake B to finish – do NOT cut off Cake A. You will be carrying all of your yarn from each cake up the sides.
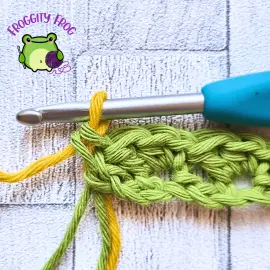
Row 2. With Cake B, turn and ch1. In the first stitch make (sc, hdc, dc) all in the same stitch. *Skip the next 2 stitches and in the next stitch make (sc, hdc, dc) all in the same stitch – this will be the sc in the row below*
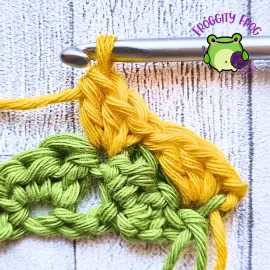
Repeat between *and* until you have 3 stitches left. Skip 2 stitches and make a sc in the last stitch of the row, changing to Cake C to finish – Do NOT cut off Cake B
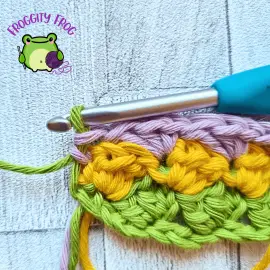
Row 3. With Cake C, turn and ch1. In the first stitch make (sc, hdc, dc) all in the same stitch. *Skip the next 2 stitches and in the next stitch make (sc, hdc, dc) all in the same stitch* repeat between *and* until you have 3 stitches left. Skip 2 stitches and make a sc in the last stitch of the row, changing back to Cake A to finish – do NOT cut off Cake C
Row 4. With Cake A, turn and ch1. In the first stitch make (sc, hdc, dc) all in the same stitch. *Skip the next 2 stitches and in the next stitch make (sc, hdc, dc) all in the same stitch* repeat between *and* until you have 3 stitches left. Skip 2 stitches and make a sc in the last stitch of the row, changing to Cake B to finish – do NOT cut off Cake A
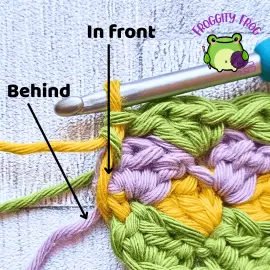
Tip – To keep your edges looking neat and to have this lovely spirally looking finish down the edges, make sure you always pull up the new strand of yarn in front of the other stitches. This will ensure your edges look consistent all the way up the blanket.
Repeat rows 2 – 4 until you finish using up your cakes.
Once you’ve finished using up your cakes you are finished! Now you just need to weave in your ends – one of the best things about this blanket is that there are just 6 ends to weave in.
Make sure you use the code FROG5 at checkout to get a discount off your purchase from Yarn Shop By Stay Alive
Now the question is – what are the plans for your beautiful Cobble Road crochet blanket? I would love to find out and see your blanket, please do come over to the Facebook group – Froggity Frogs Ribbit And Stitch and tell us all.
Also don’t forget to sign up to our newsletter to be the first to know about new stitch guides and new crochet pattern releases. You can sign up here and be the first to see what I’ve got cooking behind the scenes here at Froggity Frog.


0 Comments