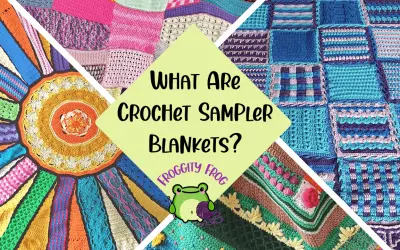
The Ring O’Bunting Crochet Pattern is such a pretty way to decorate your little ones nursery, or add a finishing touch to your party decor. Bonus points for having reusable party decorations too 😉. This pretty crochet bunting is a quick and easy way to make custom decorations for any occasion in any colour combination of your choice, and is so easy to make as long or as short as you need.
The Ring O’Bunting Garland is easy to make, and has a join as you go design, making it really easy to make it to the length you need by adding as many rings as you need to fit the space you have

Keep reading for the free Ring O’Bunting crochet pattern
I came up with this design while looking for ideas to use up my overflowing yarn stash, that I am on a mission to use up before I buy any more – a serious challenge to my yarn buying willpower I can tell you. You can check out my other stash busting crochet patterns here
This article contains affiliate links, I may receive a commission for purchases made through these links
I was flicking through Pinterest trying to find some inspiration for some stash busting pattern ideas and I found myself browsing through bunting designs. You know the ones that you made as a kid with strips of paper all linked together? Usually to decorate at Christmas, all with different brightly coloured paper – it was a great way of keeping the kids quiet for a bit. Then I suddenly thought, what if you could do that with circles? So that’s what I did.
The problem I had to solve was how to get the circles to keep their shape when the Bunting was hung up. The weight of the whole Ring O’Bunting garland was causing them to bend out of shape and turn into ovals. So I had a rummage through my supplies drawer and pulled out some fabric stiffener. What do you know, it was perfect for stiffening each ring so it kept its shape, bonus that it is cheap and easy to get hold of on Amazon.
Choosing Your Yarn For The Ring O’Bunting Pattern
The pattern proved to be a bit addicting. It is really quick and easy to make up these circles, making them the perfect crochet project for when you’re watching the latest tv series. I ended up using 2 different colourways here, one using Sirdar cotton DK and the other using Stylecraft Special DK. You an use any fibre of your choice for this pattern, you just have to decide your colour choices.
The only thing I would caution about when choosing your yarn is thinking about how heavy it is. I made 2 different colourways for my bunting and I used different fibre types for each. I used cotton for one, which is actually pretty heavy so will pull down much more as it gets longer which could distort your rings. The other set I used acrylic, which is much lighter and lets the rings keep the shape when making a longer length garland.
If you are planning on making a longer length of bunting, I would recommend using acrylic yarn over other fibres
The greys and pinks I chose in the Sirdar Cotton DK are the perfect tones for a nursery setting, while bright colours I picked out from the Stylecraft Special DK make it ideal for a party or celebration.


The colours and amount of yarn that I’ve used for each colourway, for making 25 rings are:
- Grey Sirdar Cotton DK 20g = 42m
- Pink Sirdar Cotton DK 20g = 42m
- Sirdar Cotton Prints DK Shade 352 20g = 42m
- Lapis (1831) – 45m
- Citron (1263) – 40m
- Fondant – 40m
- Grass Green (1821) – 40m
- Matador (1010) – 40m
- Lavender (1188) – 40m
You will also need:
- Tapestry needle
- Fabric Stiffener
- Pins
- Paintbrush
- A piece of old cardboard to block on
This pattern is written in US terms
Abbreviations
- Slst = Slip stitch
- Dc = Double crochet
Using the Sirdar Cotton DK I used a 3.5mm hook, and for the Stylecraft Special DK I used a 4mm hook.
My Clover amour hooks are by far my favourite, I have never found a hook that fits so well in my hand, and stops any muscle fatigue that can come from using thin steel hooks, or larger handled hooks. I definitely recommend you to try them if your hand gets easily tired when crocheting for long periods. Check them out here
The Ring O’Bunting Pattern
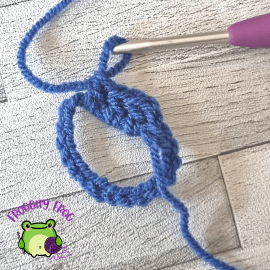
Starting ring. Start by making a chain of 20. slst into the 1st stitch.

Chain 2, then make 40dc into the loop. Slst into your 1st dc. Cut off and weave in your ends. Your first ring is complete

Next ring. Chain 20. Slip the chain through the middle of the previous ring and slst into the 1st stitch.

Chain two, then make 40dc into the loop. Cut off and weave in your ends.
Make a ring with each of your different colours then repeat the colour sequence until you have 25 rings in total, or however many you need to reach the desired length
Once you have made all of your rings, block and stiffen them by soaking them in a mixture of stiffening fluid and water. I used 2 parts of Hi Tac fabric stiffener to 1 part water and used a paint brush to thouroughly cover my rings.
Then pin your rings in place to dry using a piece of cardboard. Make sure your rings are all lying in the same direction and the same way so that they hang properly later.
I don’t recommend using blocking mats for this, as the stiffener may not be removable from your mats, affecting their use later. So an old cardboard box is perfect for this job. If you want your Ring O’Bunting to dry out quicker, flip your rings over once the top of them is dry, and repin them.

Once dried, unpin and your Bunting is complete.
Now you just need to find the perfect spot to hang your Ring O’Bunting and admire your elegant handiwork

Come and show us your fabulous Ring O’Bunting in our super friendly Facebook group – Froggity Frog’s Ribbit And Stitch where you will also find helpful tips and tricks for your crochet and be the first to know about Froggity Frog’s latest pattern updates.


0 Comments