

You can find the links for all the squares in the crochet along here. The free pattern is below, but if you’d like the ad free printable version, it is available to purchase for £5 from Ravelry
This pattern is written in US terms, but the UK translation is below.
UK Translation
- Single crochet (sc) = double crochet
- Double crochet (dc) = treble crochet
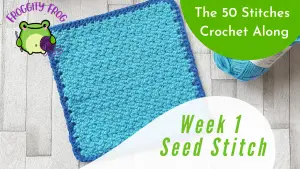
For this square I used Rico Cotton Creative Aran which is a 100% cotton non mercerised yarn. I used the shade Turquoise (36) which is one of the 4 different colours I used to create my own 50 stitches blanket. I also used a 3.5mm hook – I recommend using Clover Amour hooks. A cost effective hook that is comfortable in your hands thanks to their ergonomic design
Week 1 Of The 50 Stitches Pattern
Click here for the left hand video,
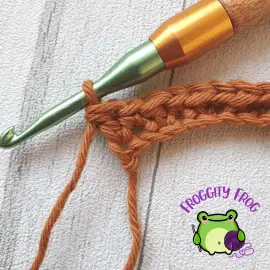
Click the image below to play the right hand video
For this square we’re using a 3.5mm hook.
If you find this hook size uncomfortable with aran/worsted yarn then go up to a 4mm, but you must also increase your hook size by 0.5mm for every square in the CAL if you do this.
Start by making a foundation chain of 31. I recommend putting a stitch marker in the first loop from your hook as the turning chain will count as a single crochet.
Row 1. In the 3rd chain from your hook, make a dc (your turning chain counts as a sc)

*Sc in the next stitch, then dc in the next stitch* repeat between *and* until the end of the chain, finishing your row with a dc in the last chain – 30 stitches
Row 2. Turn and chain 1. Make a single crochet in the first stitch (the chain 1 does not count as a stitch)

*dc in the next stitch, then make a sc in the following stitch* repeat between *and* in each stitch across, ending your row with a dc in the last stitch – 30 stitches
Rows 3-20. Repeat row 2
Your square should now have roughly equal measurements on each side, and have a stitch count of 30 stitches by 30 rows
The Border
To make my border on this piece I chose to use a contrasting colour. I used shade Gentain (87) in Rico Creative Cotton Aran and I kept with the same 3.5mm hook size that I used to make the square itself.
To add the single crochet border. Make a standing sc in any stitch on the top or bottom. Sc in each stitch across. When you get to the corner make 3sc in the same stitch – this counts as the final stitch of that row, a stitch for the corner, and the first stitch of the next side.
Start work down the side of the square. In the side of each dc make 2 sc, in the side of each sc make 1 sc.
When complete you can cut off your yarn and weave in your ends

The Interlocking Border
Now we can add the interlocking border. This is the only square we add this border to without joining to another square.
Use a 4mm hook for this. As this is the first square you will add this border on all sides.
Start in a corner and make a standing single crochet. Single crochet in all 3 corner stitches.
Slip stitch into each of the 3 corner stitches
*Chain 4, skip 3 stitches and single crochet in the next 2 stitches* repeat this across until you reach the corner. Make a single crochet in each of the 3 corner stitches, then repeat the pattern on the next side. Do this for all 4 sides.
The squares will be joined by weaving the border through these loops
Your square is complete!
If you have any questions about the pattern or the CAL, then come on over to the Facebook group – 50 Stitches where you can show us your completed squares too.


Wow.
I’m happy and I just recently download a seed stitch on YouTube which makes things easier. Thank You
What can I make using granny squares??
I’m a beginner
Squares can be joined to make all kinds of things. Blankets, ponchos, wraps bags, tops, the list is endless
What is a standing cs and a standing skip stitch?
I’ve made a video on how to do the standing sc, I hope it helps https://youtu.be/4ltdDMf_wto
I have never worked with this tiny of a hook or yarn. I could not tell a double from a single. Frogged row 1 twelve times and could never get it right.
I flunked out of class first block. First row. Man this was hard on the ego.
Don’t give up. I’m putting up another video soon giving a closer look on how to form the stitches, it may help x
I had a really hard time as well. One thing I did to help me was counting my stitches each row. 1 is sc 2 is double and from there you know all odd numbers should be a single and all even numbers should be a double. Once you’re a few rows in it gets easier to tell because the single crochet stitch from the previous row is a bit tighter and lower so you know that a double should be going there. Keep trying! Mistakes are proof you’re trying!
I went with weight 4 and Hook size H. Best for me. :-)
I just used a larger hook. I am currently using a 4.25 or G
Loving this pattern! Putting the stitch marker at the end of the rows is genius. Wish I had learned that when I first started crocheting. Thanks!
Hi kelly , I have struggled with this square. But after 3 attempts, by jove I think I got it . Thank you for all your hard work in coming up with this and letting us all have a try at it .
Shouldn’t row one read the 3rd chain from the hook (as you state in your video)?
Hi i have completed 31 stitches but my chain measures just over 18.5 cm and the chain is tight how can i mske this right i ysed a 3.5 mm hook with 4 med acrylic yarn?? Help
You can use a 4mm hook for your foundation row, then go back to the 3.5 for the rest of the square. That should leave your foundation stitches lose enough to work into
What weight yarn do you reccomend?
I’m using a thin aran weight, a thick dk would work well too xx
What should the finished size be?
Everyone’s squares will be a different size, but as long as all your squares come out the same it doesn’t matter how big they are.
Mine are around 16cm
I’ve done all 3 squares, but have had to add rows to get close to a square. All mine kinda came out like rectangles. I stretched and will block, but they weren’t even close. Not sure if it’s my tension or my yarn. Anyway, you say there should be 32 stitches on each border side, but how many joining loops do you end up with per side? I want them to join properly, but with my modifications, the numbers are scrambling in my head. Thanks!
Your squares coming out as rectangles will be due to your tension, but I wouldn’t worry about it. All of your squares will likely come out this way so they will still fit together nicely.
There should be 6 loops on the border on each side x
I did my first one wrong, forgot to translate from UK to US…… but my block turned out beautiful. I will make another correctly. Still fun!
The instructions are all in US terns, so your square should be spot on xx