

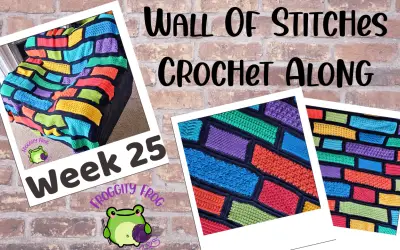
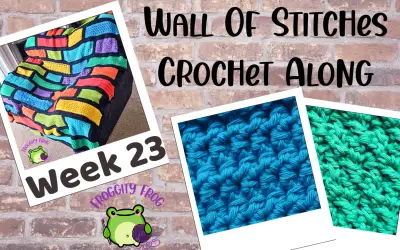
Welcome to week 16 of the Wall Of Stitches Crochet Along!
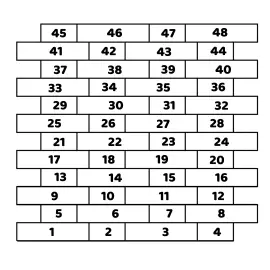
Over the next 25 weeks, we are going to be making 48 different crochet stitches, each in a different piece of this brick work like blanket. We will be adding a border to each individual piece before joining the pieces together. We will be making 2 pieces each week, 1 small 1 large.
With this crochet along I feel like I’ve gone more back towards the style of my very first crochet along – The 50 Stitches. With regular predictable sized pieces that all fit together neatly in rows – sort of, I had to give it a bit of twist with the stacked edges.
This article contains affiliate links, I may receive a commission for purchases made through these links. As an Amazon Associate, I earn from qualifying purchases.
The Wall Of Stitches is a completely free crochet along. Each week the next piece of the pattern will be published on my blog, but if you want the concise and ad free pdf delivered to you each week that will remain in your Ravelry library, you can purchase that for just £5 here. This is a one off payment that covers the entirety of this CAL.
If you want to prep ahead, you can find out how much yarn you need for each week here as well as the layout and where each piece will fit.
For this pattern I chose to use LoveCrafts own brand yarn PaintBox 100% Cotton Aran. I love how vibrant the colours are in this range and how many different shades there are to choose from – 63 at last count! The cotton is unmercerised meaning that you can see the individual strands of cotton and it can split when using it. But as far as cottons go it is lovely to use and I didn’t find splitting too much of an issue.
But if you’re looking for a yarn to use that has lots of colours to choose from and doesn’t split, there is PaintBox simply aran, a 100% acrylic yarn that has the same 63 shades as the cotton range. Other yarn ranges that would suit are Caron Simply Soft and Stylecraft Special Aran. But you can use any Aran or Worsted Weight yarn for the Wall Of Stitches.
I also used a 4.5 mm hook for the whole pattern – I recommend using Clover Amour hooks. A cost effective hook that is comfortable in your hands thanks to their ergonomic design, so doesn’t make your hands tired when crocheting for long periods of time. I love my Clover hooks and although I own several different hook brands, I inevitably end up going back and using my trusty Clovers.
Got questions or want to join the chat? Then come over to our Facebook group here and join the rest of the Froggy community.
Week 16 Of The Wall Of Stitches Crochet Along
This week we’re completing the 8th row of our blankets using the Pistachio and the Mixed Loop stitches. I used the Mixed Loop stitch in my last crochet along – The FrankenScrap, but the Pistachio is a new stitch for me. Both of these stitches make a hole free fabric and are fairly flat with a gentle texture.
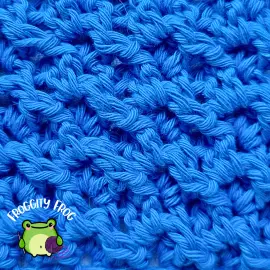
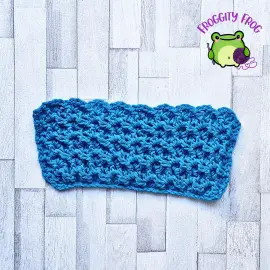
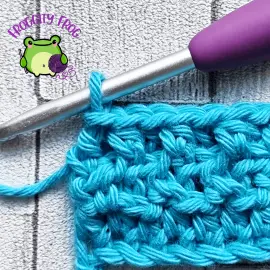
Piece 31 – Pistachio
The Pistachio stitch is an easy one row repeating stitch, which makes the fabric double sided with the same patterning on each side. It works up fairly quickly and would suit a variety of crochet projects.
I used the shade Marine Blue (634) from Lovecrafts 100% Cotton Aran range for this piece.
Click here for the left hand video
Abbreviations
- Ch = Chain
- St = Stitch
- Sk = Skip
- Sp = Space
- Sc = Single Crochet
- Dc = Double Crochet
- FPSc = Front Post Single Crochet
Start by making a foundation chain of 31
Row 1. In the second ch from your hook make a sc. *Sk the next 2 ch and then make (2dc, ch2, sc) all in the next ch.
* Repeat between *and* when you have 2 ch left, sk the next st and make a dc in the last st of the row – 10 sc, 18 ch, 19 dc / 47st
Row 2. Turn and ch1. Make a sc in the first st and then *make (2dc, ch2) all in the next ch2 sp. Make a FPSc around the next dc. Sk the next dc and sc.* repeat between *and* making a dc in the last st – 9 FPSc, 19dc, 1 sc, 18 ch / 47 st
Rows 3 – 9. Repeat row 2
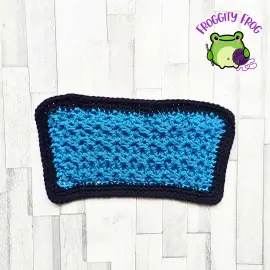
Now we need to add a border around your piece.
For the left hand video on how to add the border click here
For the right hand video on how to add the border click here
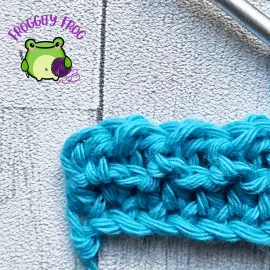
Round 1. Using your background colour, make a standing single crochet into any stitch. Make a single crochet in each stitch across the top and bottom. For the sides make 2 sc into the side of every double crochet, and 1 sc into the side of every single crochet. When you get to the corners add an extra stitch into the corner – you will have 14 sc down each side and 30 across the top, plus 1 extra sc in each corner.
When you get back to your 1st st, slst into it – 92st
Rounds 2 and 3. Ch1 and make a sc into the first st of the previous round. Make a sc in each st around. When you get to the extra corner stitch, make 3 sc in that st. When you get back to the 1st st of the round, slst into it.
When you finish round 3, cut off and weave in your ends. Round 3 should have 126st in total, with 18 sc down each short side, plus that extra sc in each corner
Now you need to join the left hand edge of the Pistachio piece to the right hand edge of the Bird Footprint piece using the Flat Braid join. You can see how to do that here.
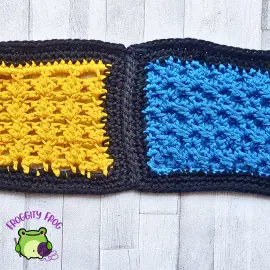
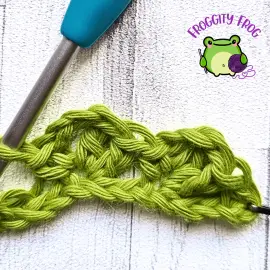
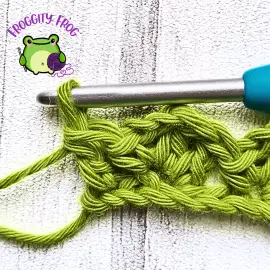
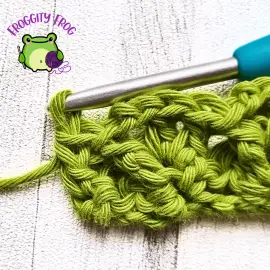
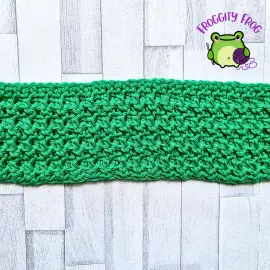
Piece 32 – Mixed Loop
The Mixed Loop stitch has a fabulous texture that is created simply by using different loops of the Half Double Crochet stitch. The texture the unused loops create is subtle making for a flat fabric that is a fairly even thickness throughout.
I used the shade Grass Green (630) from Lovecrafts 100% Cotton Aran range for this piece.

Click here for the left hand video
Abbreviations
- Ch = Chain
- St = Stitch
- Hdc = Half Double Crochet
- FBLO = Front Bottom Loop Only
- BLO = Back Loop Only
Start by making a foundation chain of 67
Row 1. In the 4th ch from your hook make a hdc (your turning ch counts as your first st of the row). Make a hdc in each ch across – 65 hdc
Row 2. Turn and ch1. Make a hdc in the first st and then *make a hdc in the FBLO (the 3rd loop) and then make a hdc in the BLO of the next st*. repeat across the row, when you have 2 st left, make a hdc in the FBLo and a hdc in both loops – 2 hdc in both loops, 31 hdc in the BLO, 32 hdc in the FBLO / 65st
Row 3. Turn and ch1. Make a hdc in the first st and then make a *hdc in the BLO and then make a hdc in the FBLO (the 3rd loop) of the next st* repeat across the row, when you have 2 st left, make a hdc in the BLO and a hdc in both loops – 2 hdc in both loops, 31 hdc in the FBLO, 32 hdc in the BLO / 65st
Rows 4 – 9. Repeat rows 2 and 3
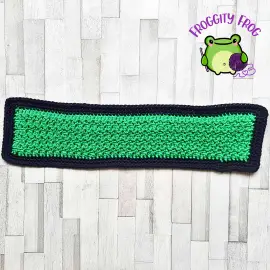
Now we need to add a border around your piece.
For the left hand video on how to add the border click here
For the right hand video on how to add the border click here
Round 1. Using your background colour, make a standing single crochet into any stitch. Make a single crochet in each stitch across the top and bottom. For the sides make 2 sc into the side of every odd numbered row, and 1 sc into the side of every even numbered row. When you get to the corners add an extra stitch into the corner – you will have 14 sc down each side and and 65 across the top, plus 1 extra sc in each corner.
When you get back to your 1st st, slst into it – 162 sc in total
Rounds 2 and 3. Ch1 and make a sc into the first st of the previous round. Make a sc in each st around. When you get to the extra corner stitch, make 3 sc in that st. When you get back to the 1st st of the round, slst into it.
When you finish round 3, cut off and weave in your ends. Round 3 should have 186 sc in total, with 18 sc down each short side, plus that extra sc in each corner
Now you need to join the left hand edge of the Mixed Loop piece to the right hand edge of the Pistachio piece using the Flat Braid join. You can see how to do that here.
This is your 8th strip complete.
You can now join this strip above your last strip using the Flat Braid join. You can see how to do that here.
Next week we will be starting the 9th row of your Wall Of Stitches blanket.
In the meantime, why not come and join our Facebook group – Froggity Frog’s Ribbit And Stitch and show us your completed pieces. Our super friendly community where you can ask all of your crochet questions, share your latest make and make new crochet friends. Come join us now right here and join in the conversation.
Don’t forget to sign up to our newsletter to be the first to know about new stitch guides and new crochet pattern releases. You can sign up here and be the first to see what I’ve got cooking behind the scenes here at Froggity Frog.


0 Comments