
The Crunch crochet stitch is a really easy crochet stitch to make that has a texture that looks like the stitches have been crunched down to create it’s signature look. In this stitch guide I will show you how to crochet the Crunch stitch with all the pictures that you need along with a video guide that you can follow along with too.
This article contains affiliate links, I may receive a commission for purchases made through these links. As an Amazon Associate, I earn from qualifying purchases.
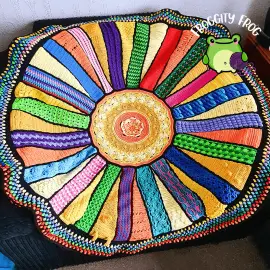
I used the Crunch stitch as one of the pieces in my Ray Of Hope Crochet Along as one of the outer rays of the mandala. Check out the pattern here, completely free!
The Crunch stitch is a really easy 1 row repeating stitch which only uses 3 different stitches making it the perfect stitch for beginners. The stitch works up quickly and it is easy to remember the repeat and keep track of your stitches.
The Crunch stitch although works up quickly, is made up of only single crochet rows, so it grows slowly in height. This stitch would suit a variety of projects as it is a hole free stitch with a gentle but distinctive texture. You could use the Crunch stitch for scarves, hats, kids clothing or even to add a bit of texture to plainer items like blankets, sweaters and wraps.
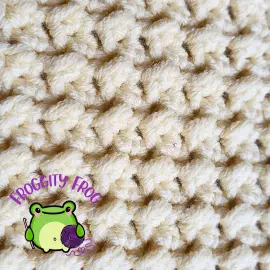
For the sample in the picture below I used Rico Cotton Creative Aran which has 54 colours in the range and a lovely choice for a thick and easy to work with yarn with beautifully bright and bold colours. It is a 100% non mercerised cotton that is beautifully soft and great value for money.
This how to guide is part of Froggity Frog’s Stitch Vault collection. Have you seen all the other stitches in there? You can take a look here all the guides are free to access and maybe you will discover some new stitches to create for yourself.
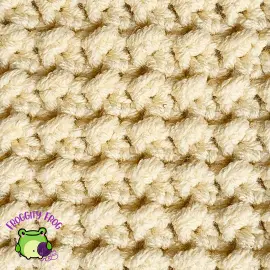
For the sample in the picture below I used Paintbox 100% cotton aran. A beautiful non mercerised 100% cotton yarn that comes in a good variety of colours that are amazingly saturated with pigment for wonderfully vibrant colours that will make your crochet grab every ones attention.
I also used my trusty Clover Amour hooks which are perfect if you are looking for a good value ergonomic crochet hook that won’t cause your hand to ache if you are crocheting for long periods of time. I’ve tried many different crochet hooks over the years, but I always end up coming back to my trusty Clovers. They just sit so well in my hand and never let me down.
How To Crochet The Crunch Stitch
Click here for the left hand video
Abbreviations
- Ch = Chain
- St = Stitch
- Slst = Slip Stitch
- Sc = Single Crochet
- Hdc = Half Double Crochet
Start by making a foundation chain in multiples of 2 plus 2 (plus 1 for your turning chain)
Row 1. In the 2nd ch from your hook make a sc. *In the next stitch make a Hdc, then slst in the following stitch* repeat between *and* making a sc in the last stitch of the row
Tip – Keep your slip stitches loose as you will be working into them in the next row. Tight slip stitches will make your life harder than it needs to be.
Row 2. Turn and chain 1. Make a sc in the first stitch of the row. *Hdc in the next stitch then slip stitch in the following stitch* repeat between *and* making a sc in the last stitch of the row
You will be working into the opposite stitch in the row below. So your slip stitches will be made into a hdc in the row below and your hdc stitches will be made into the slip stitches.
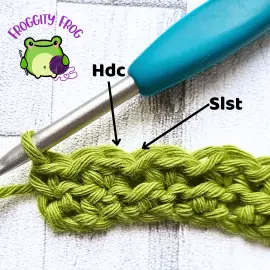
Repeat row 2 until you have as many rows as you need.
How To Add A Border To The Crunch Stitch
The Crunch stitch is made up entirely of rows that start and end with a single crochet. So to add a border you simply make 1 stitch into the side of every row.
I always recommend that you make a round of single crochet stitches around your piece first before adding any border pattern that you have planned, as doing this just helps to even your stitches out and make a nice solid round to add any further stitches into.
I used the Crunch stitch as one of the pieces in my Ray Of Hope Crochet Along as one of the outer rays of the mandala. Check out the pattern here, completely free!

You can find more free crochet stitch guides here in Froggity Frog’s stitch vault. Come on over to our Facebook group – Froggity Frog’s Ribbit And Stitch and show us what you made with the Crunch stitch. I’d love to see what you created with this crochet stitch.
Don’t forget to sign up to our newsletter to be the first to know about new stitch guides and new crochet pattern releases. You can sign up here and be the first to see what I’ve got cooking behind the scenes here at Froggity Frog.

0 Comments