
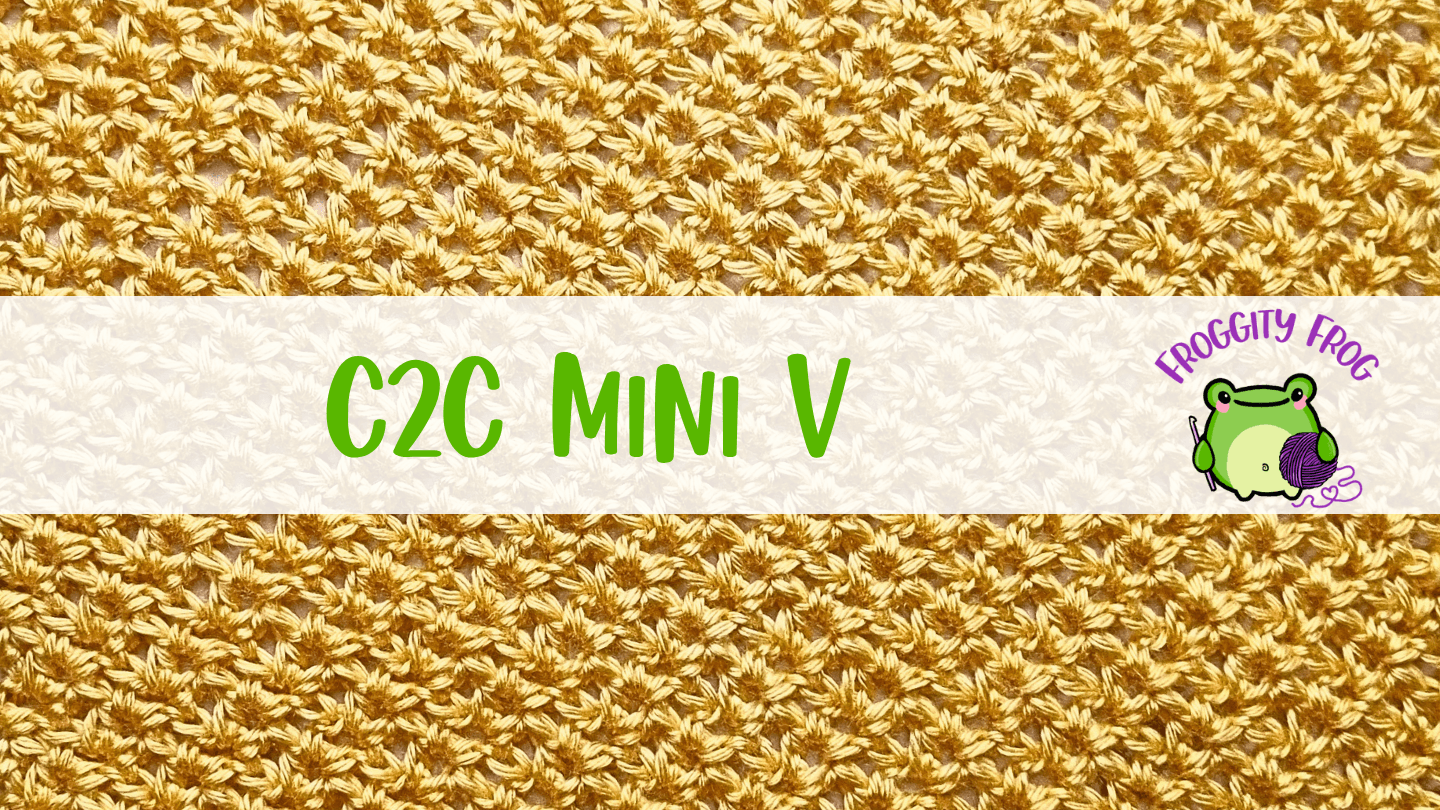
The V stitch is a very popular crochet stitch, but if you’re looking for a related stitch that is as easy to make yet looks quite different, then take a look at the C2C Mini V stitch. Not only is it a mini version of the V stitch, it is made in the C2C style so your Vs are in diagonal lines across your fabric. Keep reading for the written instructions on how to crochet the C2C Mini V stitch, or crochet it with me in the video below.
I first used the C2C Mini V stitch as one of the featured stitches in my Study Of Corners Crochet Along. As it was being used in a blanket, I didn’t want a stitch that was too lacy – which the regular V stitch can be. So I went looking for a similar stitch that had far smaller gaps in it, and of course was made in the corner-to-corner style since the Study Of Corners is made with C2C-style stitches.

C2C Mini V Stitch Video Tutorial
Click here for the left-handed video, or click below for the right-handed version.
What Is the C2C Mini V Stitch?
The C2C Mini V stitch is light and airy, but is still much less open than the regular V stitch is. Each V stitch is made using half double crochet stitches with a chain in the middle. Each row works the next V into the chain space of the row below, so that when made in the C2C style, the rows are diagonal across the fabric, yet the Vs are still stacked together.
It’s a simple stitch to make with a one-row repeat that only changes slightly between the increase and decrease sections of the stitch. Although this stitch is made in the C2C style, it is still made in rows. So you make the increase pattern until your crochet is as wide as you want it, then make the decrease section until you work back to the opposite corner and come to an end.

Why You’ll Love the C2C Mini V Stitch
The C2C Mini V is not only an easy stitch to make, it also needs far less yarn than a solid stitch. You could use it to make breezy summer tops or warm but breathable wraps. The fabric drapes nicely and despite the stitch being lightly lacy, it traps warmth really well.
It’s also easy to keep track of your stitches as you make your Vs in the chain space of the row below, so you always know where you’re up to.
This stitch would work well with different colours of yarn for every row, as the Vs stacked on top of each other will make the colours blend together and have a beautiful colour effect.
The only thing that I don’t much like about this stitch is how repetitive it is. Because it’s made with half double crochet stitches, the fabric grows in size more slowly. So you have to make a lot of rows to get to the size you need, so it can feel like a very repetitive pattern.
If you’re looking for an easy way to try out corner-to-corner style stitches, the Mini V is a great one to start with.
What I Used
To make my swatch of the C2C Mini V stitch in the videos and in the photos, I used Caron Simply Soft in the shade Sunshine and a 5mm hook (US H-8). You can use any weight of yarn or fiber type to make this stitch – just choose what suits you and the project you’re making.
How to Crochet the C2C Mini V Stitch
The written instruction are below, but you can watch the left hand video here or the right hand video here.
Abbreviations
All abbreviations are in US terms
- Ch = chain
- St = stitch
- Slst = Slip Stitch
- Chsp = Chain Space
- YO = Yarn Over
- Hdc = Half Double Crochet
- Hdc2tog = Half Double Crochet Two Together
A note about turning chains: in the pattern instructions I state to make a dc turning chain. I use a stacked or alternate turning chain, but you could also make a ch2 as your turning chain. The choice is yours about what type of turning chain you would like to use. I have a video here which shows you the different type of turning chains you can use.
You can follow the written instructions below, or follow along with the videos.
Start by making a foundation ch of 4.
Row1. In the 4th ch from your hook make a hdc. Then ch1 and make a hdc in the same ch – 3st plus a ch3 sp.

Row 2. Turn and ch3. In the first ch1 sp make a mini V st (hdc, ch1, hdc). Make a mini V in the ch3 sp to finish the row – 6st plus a ch3sp

Row 3. Turn and ch3. In the first ch1 sp make a mini V st.

Sk to the next ch1 sp and make a mini V st. Make a mini V in the ch3 sp to finish the row – 9st plus a ch3 sp.

Row 4. Turn and ch3. In the first ch1 sp make a mini V st. *Sk to the next ch1 sp and make a mini V st*. Repeat between *and* until you reach the ch3 sp. Make a mini V in the ch3 sp to finish the row.
Repeat row 4 until you reach the width you need.

Decrease Transitional Row. Turn and ch2. Make a hdc in the ch1sp

*Make a mini V in the next ch1sp*. Repeat between *and* until you have 1 ch1sp left. Make a hdc2tog over the last ch1sp and in the ch3sp to finish the row.


Decrease Row Turn and ch2. *In the next ch1sp make a mini V*. Repeat between *and* until you have 1 ch1sp left. Make a hdc2tog over the last ch1sp and the ch2sp to finish the row.
Repeat this decrease row until you have 1 row left, which will have 3 stitches in it.

Final Decrease Row. Turn and ch2. Make a hdc2tog over the last 2 chsp.

You can now cut off and weave in your ends.

Tips and Troubleshooting
How do I switch from the increase to the decrease?
When changing from the increase part of this stitch to the decrease part, you need to make a decrease transitional row. Once you start making the decrease transitional row, instead of making a Mini V stitch immediately, you have to make a single hdc stitch first. This is easily missed when still in the mind of the increase pattern repeat, but if you miss it, your decrease section won’t decrease in stitches as it should. Once this row is complete, you start on the one-row repeat for the decrease.
Can’t find the chain 1 space?
When starting your Mini V stitch, it can be hard to find the chain 1 space that you need to work into, especially if you make your chains tightly. It can be useful to mark your chain 1 spaces with a stitch marker until you get your eye in and recognise where your space is.
How to Add a Border to the C2C Mini V Stitch
To add a border to the C2C Mini V stitch, you need to consider your rows in pairs. Half double crochet stitches are halfway in height between a single crochet and a double crochet. A single crochet needs 1 stitch made into the side of each row and a double crochet needs 2 stitches made into the side of each row.
This means a half double crochet needs 1.5 stitches made into the side of each row, which of course is impossible. To solve this problem, you need to make 2 stitches into the side of 1 row of the stitch and then make 1 stitch into the side of the next row. This can take careful tracking as you work your border and it can be useful to mark where your stitches need to go with stitch markers. The picture below shows arrows where your border stitches need to go to stick to this pattern of working.
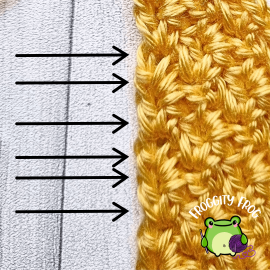
To work around the corners of your stitch, you need to work 3 stitches into the corner to create a smooth turn. Once you’ve worked into the corner, you then restart the pattern of making 2 then 1 stitches into the rows.
I would recommend using a plain solid border for this stitch, as this will help to pull your stitches out so they become evenly spaced. The solid border will then contrast well with the airy main stitch.
More Stitches Like This
I have over 100 other free stitch guides inside my free online crochet stitch dictionary here. But below are 3 stitches I would recommend trying next.
- C2C Moss stitch – another simple one-row repeat C2C-style stitch.
- V stitch – made in rows using the larger double crochet stitch. This makes for a much more lacy stitch that works up more quickly.
- C2C Waffle Shell stitch – if you’re ready for a bigger challenge for a C2C-style stitch.
C2C Mini V Stitch FAQs
What can I use the C2C Mini V stitch for?
The Mini V would be ideal for light cover-up tops in the summer or wraps to be worn in the cooler months. But you can use it for anything where you want a light and breathable fabric.
Can the C2C Mini V stitch be made by beginners?
If you’ve never made any other C2C-style stitches before, then this stitch will be a bit of a challenge when it comes to getting the hang of the increases and decreases, but otherwise this is an easy stitch to try out. However, if you’re familiar with increasing and decreasing stitches, then this will be a nice easy stitch to take on.
Would this stitch work with multicolour yarn?
I wouldn’t use a short striping yarn for this stitch. The frequent colour changes would hide the stitches so you wouldn’t see the stacked Vs as well. However, it would work well with a longer length striped yarn or by changing colours every row.
How is the C2C Mini V stitch different from mini C2C?
Mini C2C is an entirely different stitch. It’s made in blocks rather than traditional rows.
Is there a left-handed guide?
Yes, there is a left-handed video which you can watch here.
Ready to Try the C2C Mini V Stitch?
The C2C Mini V stitch is an easy corner-to-corner style stitch to make. It was the perfect stitch to add to my Study Of Corners blanket, as it gave me the look of the V stitch without the huge gaps and has many more uses besides.
For my free guide on 5 Crochet Stitches Worth Trying, sign up to my newsletter here.


0 Comments