
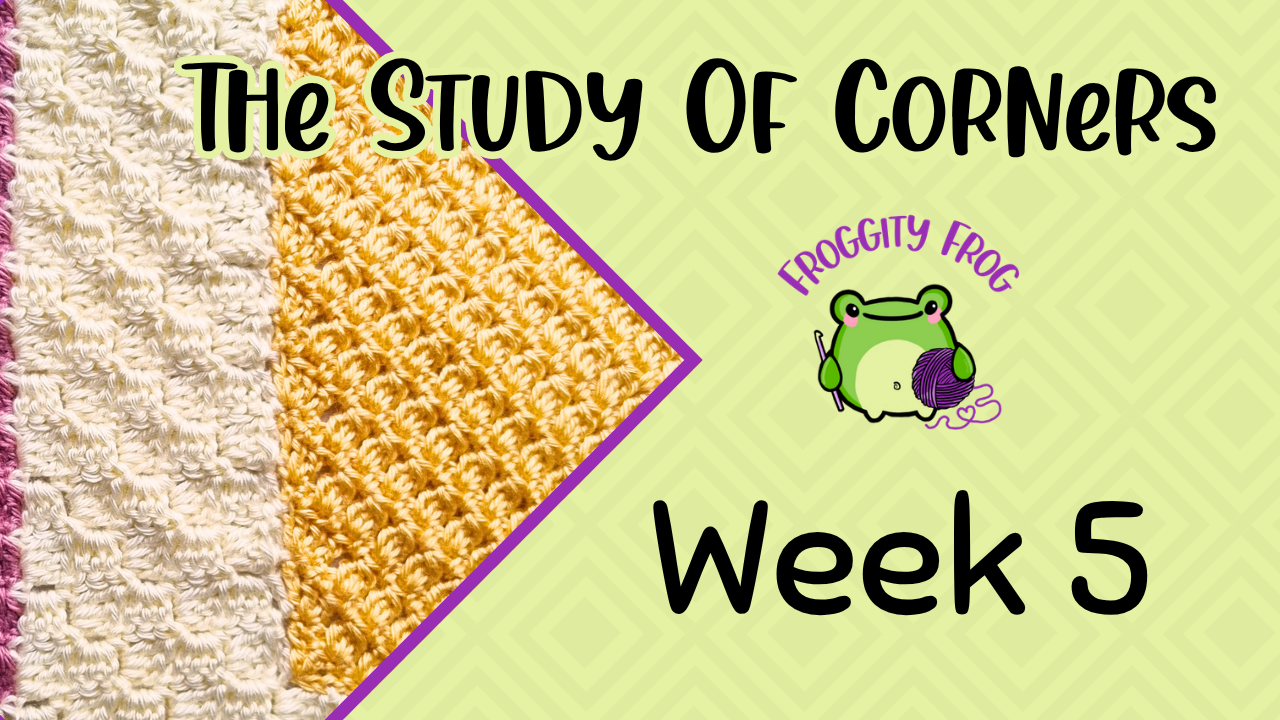
Welcome to week 5 of the Study Of Corners crochet along! Let’s get started on bordering last weeks square and joining it to weeks 2 and 3.
Keep reading for our week 5 pattern but if you haven’t heard much about this crochet along before, then check out this blog post here which will tell you what to expect.
This article contains affiliate links, I may receive a commission for purchases made through these links. As an Amazon Associate, I earn from qualifying purchases.
For week 5 we’re adding the border to our Cluster square and at the same time joining it to our Alpine square. This border is also what will join all of our squares together in the join as you go way, so you will need to use your background colour for this.
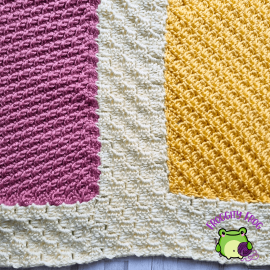
For this square you’ll need a 5mm hook – this is the hook size I used for the whole pattern. I used Caron Simply Soft in the shade Off White. But you can use any aran or worsted weight yarn of your choice.
If you’d rather skip the ads and get an expansion pack alongside each week’s square, you can grab this pattern on Ravelry for £5 here. It’s released on the same weekly schedule as here, just with the extras and none of the clutter.
(And if you’re the type who collects every pattern I release – this one included – my Pattern Pass gets you the lot, including everything I publish in future, for a one-off £49.99.)
Week Five Of The Study Of Corners
Click here for the left hand video
We are going to be bordering each piece with a C2C border, which we will also use to join the pieces too.
It’s very important that you take note of the direction your starting C2C block lies for each piece. If it’s wrong, your blocks will not line up with the ones from the previous pieces.
For the blocks on the left hand edge, you will start the border by making 4 rows of C2C stitches. Then how we continue after that depends on which direction we want our first C2C Block to lie – these instructions will be under each square.
To make a C2C stitch:
Start by making a foundation chain of 6.
Row 1. In the 4th ch from your hook make a dc. Make a dc in each of the next 2 ch – 1 C2C Block
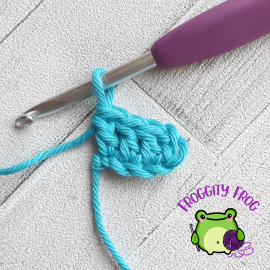
Row 2. Turn and ch6. In the 4th ch from your hook make a dc. Make a dc in each of the next 2 ch. Slst into the chsp of the block in the previous row and ch3.

Make 3dc into the chsp – 2 C2C Blocks
Row 3. Turn and ch6. In the 4th ch from your hook make a dc. Make a dc in each of the next 2 ch. *Slst into the chsp of the block in the previous row and ch3. Make 3dc into the chsp*. Repeat between *and* until you reach the end of the row – 3 C2C Blocks
To continue increasing your rows, Repeat row 3. You will add a block with every row
To decrease your C2C stitches
Turn, make a slst into each of the 3 dc of the previous block. Slst into the chsp of that block and ch3.

Make 3dc into the chsp.
Slst into the turning ch of the last block of the previous row – You will lose 1 block every row.
As we want our borders around the pieces to be straight sided, we will be using a mix of increasing and decreasing for our rows.
Cluster Square Border
Remember that these pictures are taken upside down to match the direction we’re crocheting in.
To border the Cluster square we will actually be adding the border while joining to the Alpine square all together.
To get started, we will be starting by joining Colour A to the right hand edge of the Alpine square and we need that 1st C2C block to be orientated up/down.
Start by joining into the corner of the Alpine square (with the back side of the square facing you) and chain 6. Now make a C2C block into that chain. You will finish your block back at the side of the Alpine square.
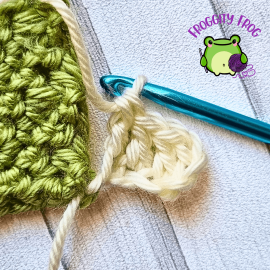
Slip stitch into the side of the Alpine square 2 stitches down from your join. Now chain 2 and make a slst 2 stitches down.
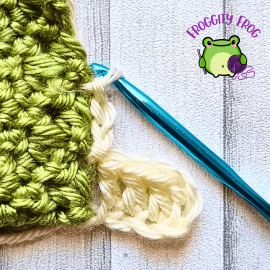
Turn and ch3. Make a C2C block into the chsp you just made and continue making the row of C2C stitches.
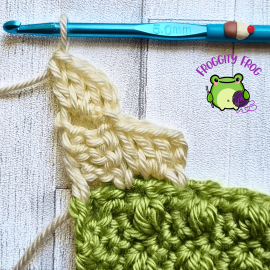
Make 4 rows of C2C stitches. We will be joining into the side of the Cluster stitch at the start of row 5.
To start the 5th row, ch3 and then join into the top left corner of the Cluster square – this will look best if you remove your hook from the working loop, insert your hook into the square and then hook back into the working loop and pull through.
Then ch2 and slst into the side of the Cluster square 2 stitches up from your initial join.
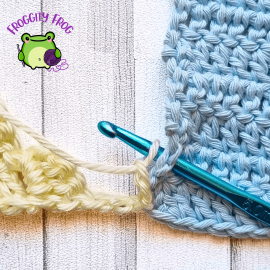
Now you will make a C2C block into each of the 3 chains you made.
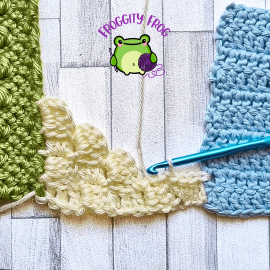
Continue down the side of each of the squares. Each square will have 18 C2C blocks down each edge.
When you reach the bottom of the Alpine square, keep going. You will be joining into the blocks you made across the bottom of the Alpine square.
Then you start working the C2C across the bottom of your Cluster square. To make the turn you will make a ch3, count 2 stitches across and slst. From there you will carry on making the border as you have been.
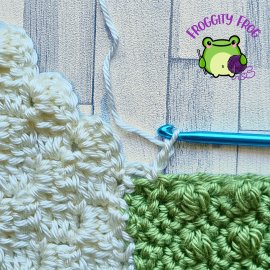
You will keep making C2C rows so that the bottom of the Cluster square also has 5 C2C blocks along the bottom edge. There will be 18 C2C blocks across the bottom edge of your square.
When you get to the bottom right hand edge of the Cluster square, you will stop before you make the block at the edge. You want to make the chain 2, but don’t make the double crochet (like in the picture below). We need to set up the chsp for when we add the border to the next square.
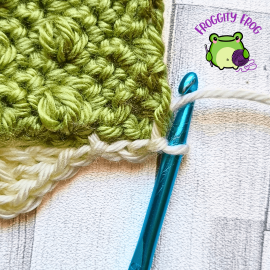
Once you’ve got to this point you can cut off your yarn and weave in your ends.
You can also find all the links to each part of the CAL on this page here, which will be updated each time a new part of the pattern is released.
Want next week’s square sent straight to your inbox? Sign up for CAL alerts here and you’ll never have to go hunting for the next post.
Click here for the pattern for week 6
Loved this square? The Ravelry pattern gives you the same CAL ad-free with an expansion pack each week for £5.
Come on over to our Facebook group, Froggity Frogs Ribbit and Stitch, and show us your squares, I would love to see what yarn you chose. Don’t forget that if you ever have any questions, post into the group and I’ll be there to answer.
0 Comments