
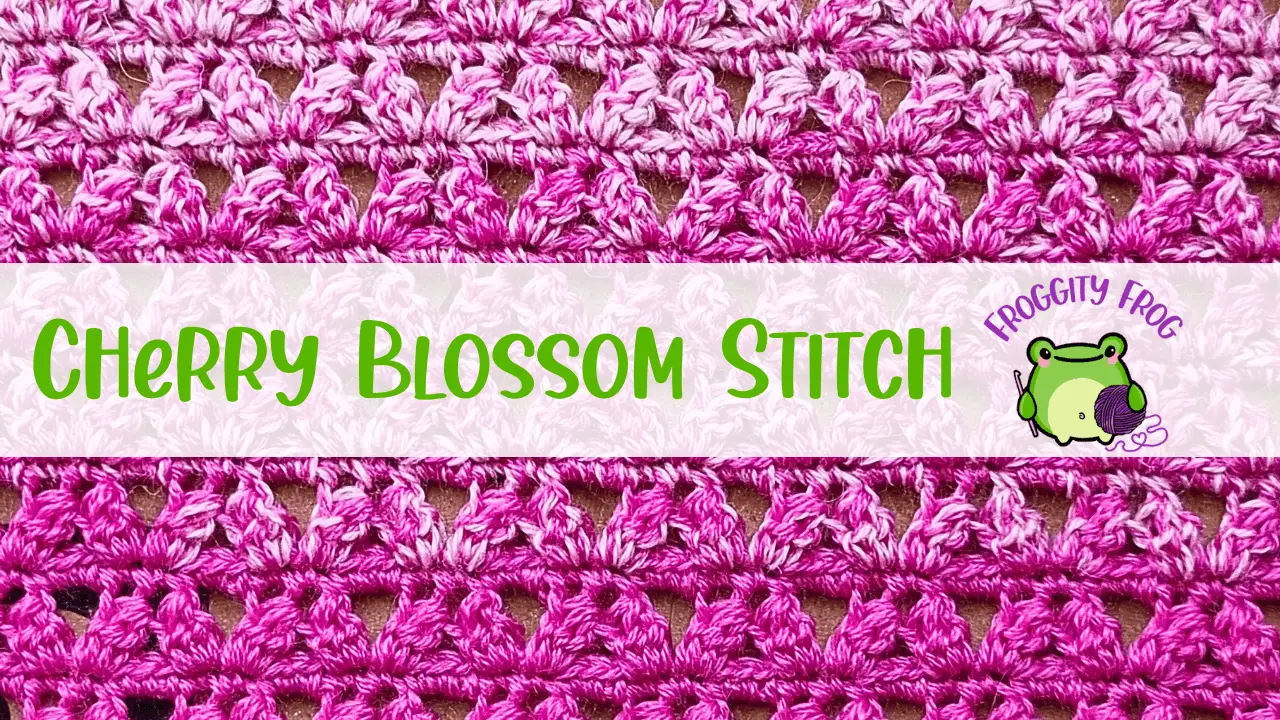
The Cherry Blossom stitch is made to look like a flower with 4 petals made over 4 rows. It’s a lovely repeating pattern made up of puff stitches. In this stitch guide I will show you how to crochet the Cherry Blossom stitch with all the pictures that you need along with a video guide that you can follow along with too.
Keep reading for the full written instructions on how to crochet the Cherry Blossom stitch. But if you would prefer to crochet along with me then watch the video below which is available in both left and right handed versions.
Click here for the left hand video
This article contains affiliate links, I may receive a commission for purchases made through these links. As an Amazon Associate, I earn from qualifying purchases.
I first used the Cherry Blossom stitch in the FrankenScrap crochet along as one of the pieces of the quilt like blanket. You can access the whole pattern for free here.
The Cherry Blossom stitch looks like a four petaled cherry blossom flower. It’s a very pretty looking stitch that uses cluster stitches to create the petals. I would class this as an intermediate stitch dues to using so many clusters and having to keep count of your stitches.
The Cherry Blossom stitch can be used for a variety of projects. Although it is a lacy stitch it doesn’t create an overly open fabric, so will make warm but breathable wraps and cardigans. This stitch would look great for beach cover ups or even for boleros for special occasions. In fact, I loved this stitch so much for exactly that reason that I designed a sleeved wrap pattern here using the Cherry Blossom stitch, if you want to see it in action on a full project.
For the sample in the picture below I used Rico Cotton Essentials DK in shade 89. This is one of my go too yarns, and I have several balls of it in my stash. It’s 100% cotton and is lovely and silky and soft to the touch. It is a really nice cotton to work with and doesn’t split overly much.
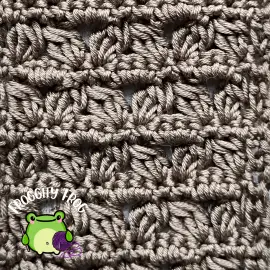
This how to guide is part of Froggity Frog’s Stitch Vault collection. Have you seen all the other stitches in there? You can take a look here all the guides are free to access and maybe you will discover some new stitches to create for yourself.
The yarn I used in the pictures of this stitch guide below is Stylecraft Cotton Classique DK, a 100% cotton yarn. It’s a non mercerised cotton that is lovely and soft, but it can get a bit splitty if you frog it a couple of times. It does makes lovely cosy blankets though and is the yarn that got me hooked on cotton as my fibre of choice. I think I first got a ball of this yarn in a mystery bag I got off ebay, and it was a great yarn discovery for me and I’ve been loving using this yarn ever since.
I also used my trusty Clover Amour hooks which are perfect if you are looking for a good value ergonomic crochet hook that won’t cause your hand to ache if you are crocheting for long periods of time. I’ve tried many different crochet hooks over the years, but I always end up coming back to my trusty Clovers. They just sit so well in my hand and never let me down.
How To Crochet The Cherry Blossom Stitch
Click here for the left hand video
Click here for the right hand video
Abbreviations
- Ch = Chain
- Sk = Skip
- St = Stitch
- Sc = Single crochet
- Dc = Double crochet
- Dc3tog = Double Crochet 3 Together
For this stitch you will need a foundation chain in multiples of 5 plus 1 (plus 1 for your turning chain)
Row 1. In the 3rd ch from your hook make a sc (your turning ch counts as your 1st st of the row). Make a sc in each st across
Row 2. Turn and ch1. Make a dc turning ch in the 1st st. Sk the next st and *in the next st make a dc3tog cluster. Ch3, make a dc3tog cluster in the next st. Sk the next 3 st*
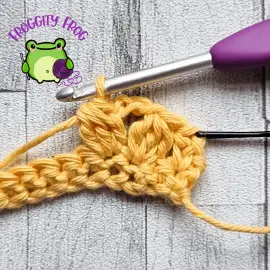
Repeat between *and* and when you have 2 st left, sk a st and then make a dc in the last st of the row.
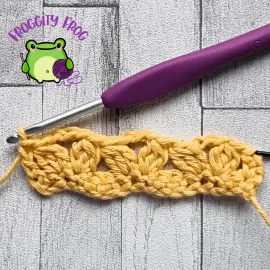
Row 3. Turn and ch1. Make a sc in the first st, then make a sc in the top of the cluster *make 3 sc in the chsp and then make a sc in the top of each of the clusters*
Repeat between *and*, then make a sc in the last st of the row
You will have 1 extra stitch in this row than the previous one. Your stitch count will return to the correct count in the next row.
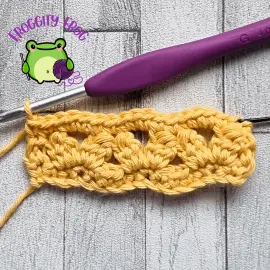
Row 4. Turn and ch1. Make a dc turning ch in the 1st st, then make a dc3tog cluster in the next st. *Sk the next 3 st and then make a dc3tog cluster in the next st. Ch3 and make a dc3tog cluster in the next st.* repeat between *and* once more. In the 2nd to last st make a dc3tog cluster and then make a dc in the last st of the row.
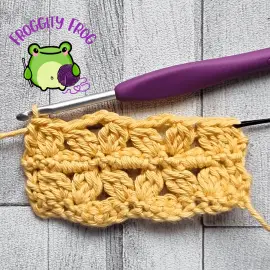
Row 5. Turn and ch1 and make a sc in the 1st st. Make a sc between the dc and Cluster. *Make a sc in the top of each of the 2 clusters and make 3sc in the ch3 sp.* repeat between *and* when you get to the end of the row make a sc between the last cluster and the turning ch and then make a sc in the last st of the row
Repeat rows 2-5 until you have as many rows as you need
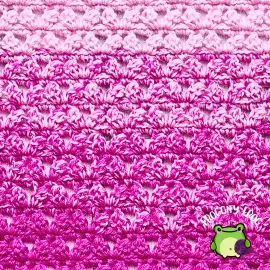
How To Add A Border To The Cherry Blossom Stitch
To add a border to the Cherry Blossom stitch you want to make 1 stitch into the side of every single crochet row, and 2 stitches into the side of every double crochet row.
Make a stitch into every stitch across the top and bottom.
I always recommend that you make a round of single crochet stitches around your piece first before adding any border pattern that you have planned, as doing this just helps to even your stitches out and make a nice solid round to add any further stitches into.
If You Enjoyed The Cherry Blossom Stitch
If you enjoyed the Cherry Blossom stitch then these stitches may interest you too:
- Thistle – Another floral themed stitch that uses shells and double crochet stitches to create the look of Thistle flowers.
- Simple Daisy – A floral themed stitch that looks likes rows of chained daisies and is fairly easy to make.
- Side Saddle – This stitch also uses clusters to create the stitches and has a lace like look, but the Side Saddle is a slanted stitch that has interlocking rows and is much simpler to make than the Cherry Blossom stitch.
FAQs
Is the Cherry Blossom stitch hard to crochet? I wouldn’t recommend this stitch for beginners. I would class this as an intermediate level stitch.
Does the Cherry Blossom stitch need a lot of yarn? This stitch uses lots of clusters so it does need much more yarn than you would expect from a stitch that has a lace like appearance.
What can I use the Cherry Blossom stitch to make? This stitch looks great when made into wraps. It would also look fabulous as a classy top or a dress.
You can find more free crochet stitch guides here in Froggity Frog’s stitch vault. Come on over to our Facebook group – Froggity Frog’s Ribbit And Stitch and show us what you made with the Cherry Blossom stitch. I’d love to see what you created with this pretty floral crochet stitch.
Don’t forget to sign up to our newsletter to be the first to know about new stitch guides and new crochet pattern releases. You can sign up here and be the first to see what I’ve got cooking behind the scenes here at Froggity Frog.

0 Comments